
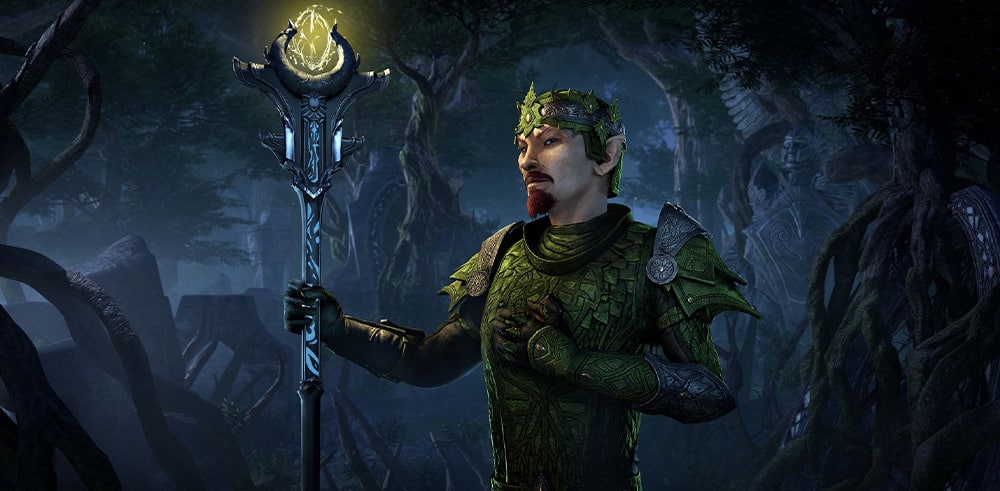

Our latest featured ESOTU player build is the Daedric Master. This unique Sorcerer build takes tanking to a whole new level—with Daedra at your side and a Restoration Staff at your fingertips for a little extra support, the Daedric Master is an incredibly resilient ally (or foe).
Welcome back to the Battlemaster's Corner, where we feature character builds created by you, the ESOTU community! In this article, you'll meet the Daedric Master. This Sorcerer Tank build can do it all, dominating enemies by summoning Daedra, unleashing synergy abilities, and dealing blows with sword in hand. Not to mention moderate healing abilities, which round out this build as a viable Sorcerer option. If you're looking for a stalwart new build for your Sorcerer, give the Daedric Master a try!
We always enjoy receiving your character builds and seeing all the creative ways you combine abilities and equipment. If you have a character build you'd like to see in a future Battlemaster's Corner, please it to us at community@elderscrollsonline.com. Don't forget to include a handful of nice screenshots of your character for us to choose from!
THE DAEDRIC MASTER
The Daedric Master is a unique spin on an uncommon archetype—the Sorcerer Tank—that uses synergistic abilities to essentially win fights through attrition. As the Daedric Master stands resolute, his powerful summoned Daedra win him the day. Amidst the heat of battle, he is capable of providing some moderate healing of his own. He is a one-man team, adept at fielding three summoned Daedra at a time while also providing his own area-of-effect support.
The keys to his success are the Unassailable and Hist Bark item sets, making him virtually impregnable while blocking. When doing so, he gains roughly 500 armor and spell resist in addition to a flat 18% dodge chance. This means almost one in five attacks won't hit you. Using his Storm Calling power, he is able to deal damage despite the fact that he does not use a Destruction Staff at all—though you wouldn't know that from the way he performs. Unlike other Sorcerers who use their abilities in an attempt to overwhelm the opposition, the Daedric Master uses his to become a juggernaut, immovable against an enemy onslaught.
The difference between using a group and simply being on his own is two things: who's actually healing you, and how quickly the enemies die. The Daedric Master's skills and playstyle change little between solo and group content - and honestly, he can solo group content. In battle, the Daedric Master uses Summon Clannfear and Summon Restoring Twilight to obey his beck and call, while increasing their effectiveness further through Empowering Ward. Additionally, simply having these abilities on your bar is going to increase your Health regeneration because of your Daedric Protection passive. As for his ability to tank, he uses techniques both from his martial training with One Hand and Shield, as well as what he learned from the Undaunted, in order to hold monsters' attention. Combining Liquid Lightning and Boundless Storm provides some area-of-effect supplement for his summons' damage output, and Boundless Storm additionally increases his defenses.
As the fight draws on, or against particularly dangerous foes, the Daedric Master will call upon a Greater Storm Atronach to bolster his lethality. Its area stun, when used correctly, can cause a perfect lull in the battle long enough for the Daedric Master to turn the tides and overwhelm the enemy with his reinforcements. His other Ultimate can be virtually anything, but Absorption Field and Shatter Soul are incredibly useful, dependent on the situation.
Now, the true strength of this build comes from your ability to quickly and efficiently swap weapons in combat, knowing where all your abilities are located and using them appropriately. Even so, the inherent tenacity of it makes the Daedric Master incredibly tough. Entering battle with your summons at your side, taunting the enemy to you, swapping to throw down a patch of lightning, dropping a healing circle, then switching back to your sword and releasing the Boundless Storm can be done within seconds, and the effects of this will devastate your opponents.
PRIMARY WEAPON: ONE HAND AND SHIELD
Summon Familiar (Summon Clannfear) – This great summon provides a source of damage, as well as situational battlefield control. As an added plus, if he is to be unsummoned, he'll heal you for a large amount of Health, as well as refunding you valuable Magicka in the form of your Rebate passive.
Summon Winged Twilight (Summon Restoring Twilight) – This summon is another source of damage, and with the morph she'll also increase your Magicka recovery rate. Just like the Clannfear, if she is destroyed or otherwise unsummoned in combat, she will Rebate you some Magicka.
Puncture (Pierce Armor) – This is your bread and butter tanking ability. Reducing the enemy's armor is fantastic, and with Pierce Armor you also reduce their spell resistance, making both your Clannfear and Twilight hit harder, as well as any team mates you may have.
Inner Fire (Inner Rage) – Ideally you'd think we'd want to have Inner Fire work off of weapon damage and cost Stamina, right? Well, since we've stacked some Magicka regen from passives, our Restoring Twilight restores even more Magicka, and we're blocking quite a bit, having a ranged taunt that works off of Magicka instead helps spread out our resource management quite a bit.
Lightning Form (Boundless Storm) – Essential for large-scale tanking, this ability increases your armor and spell resistance quite a bit, as well as dealing damage to everyone you're in melee combat with. As an added bonus, for six seconds when you activate this ability you have an increased move speed, which can be used to quickly get to a monster to grab aggro so they don't kill your healer or too close to melee with a boss.
Summon Storm Atronach (Greater Storm Atronach) – For longer, protracted fights, for when you're outnumbered, or for when the enemy has simply made you angry, you can summon the frightening Greater Storm Atronach onto the field. He is a game-changer, and your pet buffs affect him as well, making him truly a force to be reckoned with.
SECONDARY BAR: RESTORATION STAFF
Summon Familiar (Summon Clannfear) – This summon is on the same slot on the secondary bar, allowing us to switch weapons in combat without having to remember which key we don't want to press to de-summon our minion and allowing us to not accidentally drop it through weapon swapping.
Summon Winged Twilight (Summon Restoring Twilight) – This summon is on the same slot on the secondary bar, allowing us to switch weapons in combat without having to remember which key we don't want to press to de-summon our minion and allowing us to not accidentally drop it through weapon swapping.
Lightning Splash (Liquid Lightning) – This is essentially your only source of direct-damage. You lay down a field of lightning and position your foes so they stand inside it. It's a class ability, so it doesn't require a Destruction Staff to use.
Conjured Ward (Empowered Ward) – What healer doesn't like their tank to be able to use a damage shield of their own, right? The real reason this is here, however, is to increase the damage your pets are dealing to the backs of your enemies as you hold their attention with your taunts.
Grand Healing (Healing Springs) – This simple, no-frills skill makes the tank a capable off-healer when the need arises, especially for solo gameplay. It provides you a healing source, allowing you to win the vast majority of fights through attrition - outlasting your enemies.
Negate Magic (Absorption Field) – This Ultimate is a boon to any group, bringing quiet to a raging fight and giving your team the few seconds needed to regroup, turning a losing battle into the enemy's rout. Ending spell effects, stunning enemies, and silencing spellcasters can turn the tide of most battles.
ALTERNATE ABILITIES
The above skills are primarily for if you happen to be tanking in a group. For solo play, simply replacing Inner Fire (Inner Rage) with Daedric Curse (Daedric Prey) makes your summons that much more powerful against their targets. Swapping Negate Magic (Absorption Field) for Soul Strike (Shatter Soul) on your secondary bar makes you more proficient in dealing with single targets on your own.
ARMOR & WEAPONS
Five Heavy, One Medium, One Light
The reason you want five Heavy, one Medium, and one Light is for the Undaunted Mettle passive, which will increase your Health, Stamina, and Magicka.
The two sets that make this shine are the Unassailable and Hist Bark. Now, because we're Daedrically smart here, we were also able to free up enough room for one of the Undaunted helm/shoulder sets as well. So we're getting the full five-piece effects of two sets, and one of the Undaunted skill line passives as well.
Now, ideally you'd be working with the Maw of the Infernal set, allowing you to have up to four (!) Daedra on the field at a time. Unfortunately, luck has been working against me, so I have to settle with the Blood Spawn set for now. If you completely lack any of the Undaunted head/shoulder sets, you can even substitute Alessia's Bulwark to further bolster your defenses.
The Unassailable set comes pre-enchanted with Health on all the important pieces, as well as the Impenetrable Trait. We simply fill in the rest with much of the same—the Hist Bark pieces will have a Health Enchantment on all the major pieces and a Stamina Enchantment on all the minor pieces. All should have the Impenetrable Trait as well.
Head: Maw of the Infernal's Helm
Shoulders: Maw of the Infernal's Shoulders
Chest: Cuirass of the Unassailable
Belt: Belt of Hist Bark (Impenetrable Trait, Stamina Enchantment)
Gloves: Bracers of Hist Bark (Impenetrable Trait, Stamina Enchantment)
Legs: Greaves of the Unassailable
Boots: Boots of Hist Bark (Impenetrable Trait, Stamina Enchantment)
Necklace: Badge of the Unassailable
Ring: Ring of the Unassailable
Ring: Ring of the Unassailable
Weapon One: Hammer of Hist Bark (Defending Trait), Shield of Hist Bark (Impenetrable Trait, Health Enchantment)
Weapon Two: Restoration Staff of Hist Bark (Defending Trait)
Mundus: This build works so well you can use anything here. Good options are the Lord, the Lady, or the Tower, but I personally use the Shadow.

